


I bought a mini battery cell solder circuit. But the result was not as expected.
Therefore, I made myself a spot welder to solder new battery cells.
Making yourself a battery cell spot welding machine is also very useful, you can use it to re-solder laptop batteries, make battery blocks for hand tools, cleaning robots, remote control cars...
Supplies
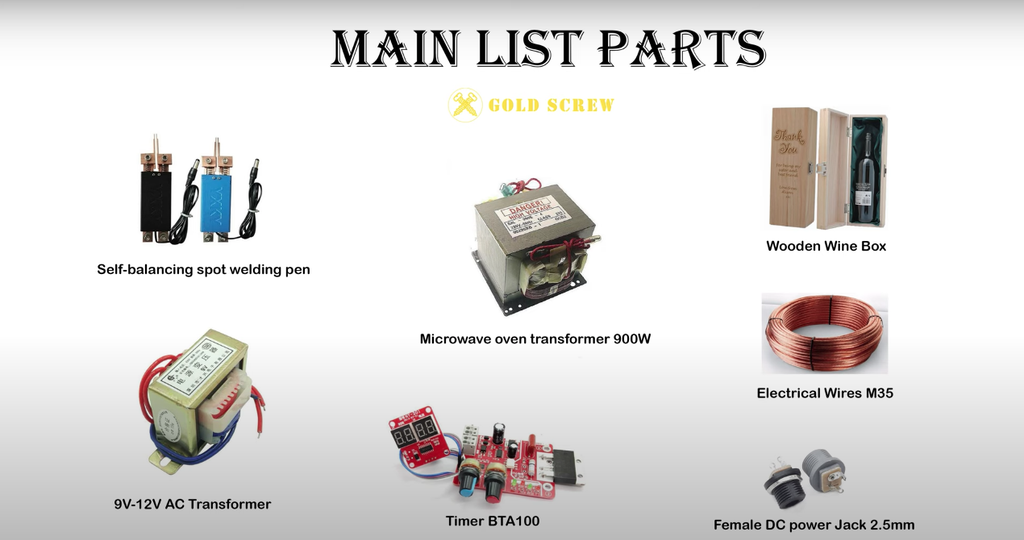
* List of main components:
1- Microwave oven transformer 900W
Find it at local shop
2- Timer NY-D01 BTA100
https://sea.banggood.com/custlink/vDvE0npVhs
3- Power cord M35
Find it at local shop
4- Transformer 9V~12V AC
https://sea.banggood.com/custlink/KGDYBArFRm
5- Welding hand balance force
https://sea.banggood.com/custlink/3GKh6npVyI
6- Box (I use wine bottles)
7- DC connector 2.5mm
https://sea.banggood.com/custlink/DmGygNJFyL
8- Wires with different sizes
https://sea.banggood.com/custlink/3GDy4bpPdr
9- Nickel Strip
https://sea.banggood.com/custlink/GGGEBQWtyR
Step 1: Processing Transformer, Removing Secondary Winding


You only need to keep the primary coil.
So you can use hacksaws, cutters, drills, chisels... to completely remove the secondary coil.
Step 2: Remake the Secondary Winding


Use wire with a cross section of at least 35mm.
And you can wrap 4 or more loops the better.
* Note: Completely insulate this secondary conductor, avoiding short-circuit to the microwave transformer shell. That would be very dangerous!
Step 3: Connect the Parts Together


I use a wooden box of a wine bottle to hold all the ingredients inside.
Then connect the components according to the diagram in the picture I attached
Step 4: Testing


Connect with power supply 100v-220v AC
And then connect the limit switch on the self-balance soldering pen to the DC jack.
Adjust the Timer to suit the thickness of zinc solder you have.
Here I tested with 0.2mm thickness solder zinc.
The resulting zinc solder is white, does not burn and the zinc has adhered to the surface of the 18650 battery.
So the result is pretty good!
Thanks and hope you enjoy,


0 Comments